
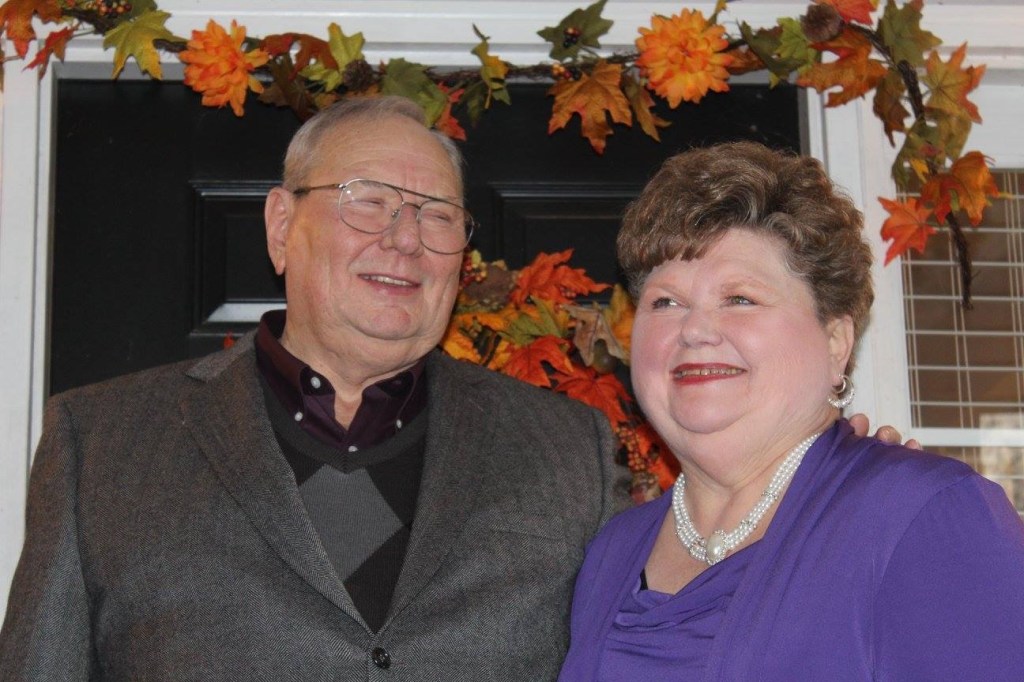
Saying “Yes to the dress” is a popular wedding saying these days, even the title of a popular TV series, an affirmation of perfection, of all being right with my world. By saying “Yes” to my idea of making flower girl dresses from my sister’s wedding gown and my daughter’s agreement, it gave me a way to work through the grief of missing my sister, while honoring her as well. The flower girl’s dresses felt like a blessing from “Aunt Jan” who would have had a ball celebrating with us all.
I received the dress shortly after Janice’s funeral on a rainy day from one of Janice’s stepdaughters, Daphne, who doesn’t sew but appreciated the skill set. Daphne’s goal was to pack my car and clean out the sewing room. Into the car went the dress, patterns, lots of fabric, quilting supplies (I don’t quilt, but learning has been on my plan for years) and lots of quilting books. When I later learned Janice’s daughter-in-law Kandi was learning to sew and quilt, I divided the quilting supplies and books with her. There were just too many lovely sewing things!
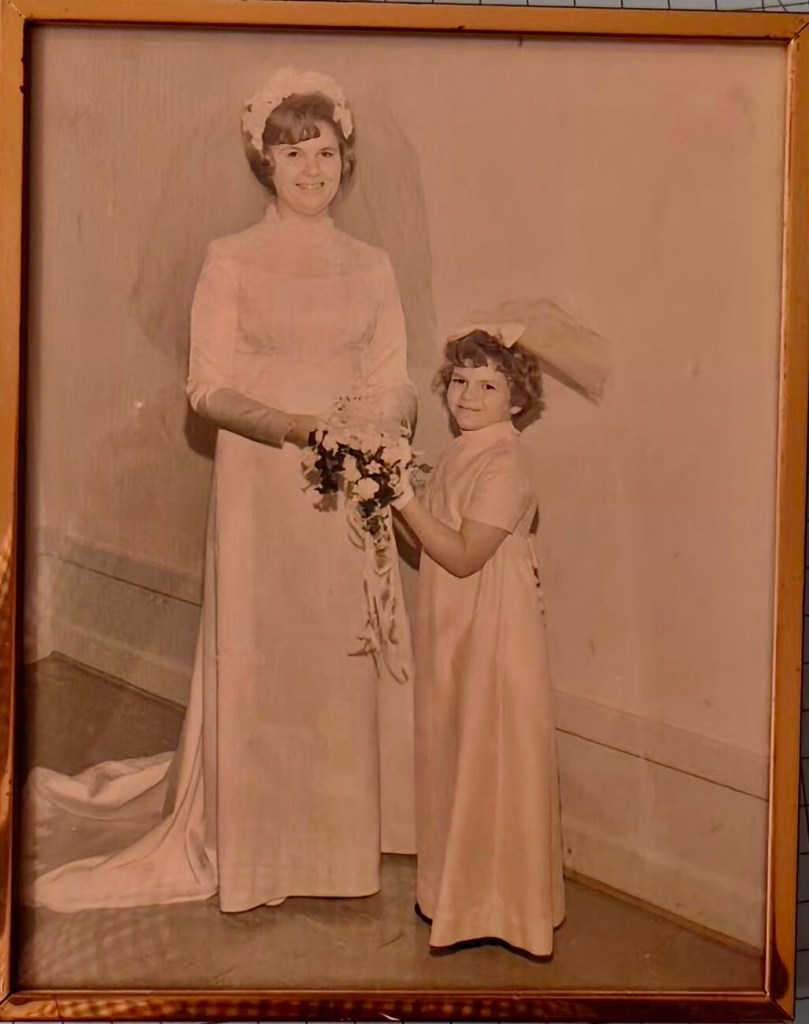
The most difficult part of making the dresses was the scariest part, cutting them out. The pattern, Simplicity 1211, was 3-6; the toddler dress would be a 3 narrowed a bit, the 5-year-old’s a 4 with size 6 length, as both girls were tall and slimmer than average. Janice’s dress was an A-line with extra length and a detachable train, but even with the extra length, cutting out two little girl’s dresses would be a puzzle!
The next step was measuring both girls. My granddaughter the toddler lives 4 hours away, so scheduling was challenging, but it was pretty easy to estimate her growth rate in 5 months (or so I thought). The 5-year-old lived across town, so it was just a matter of arranging our schedules. I traced patterns for each girl, starting with the 3 for my granddaughter and tracing the 4/6 for the 5-year-old. If you aren’t familiar with small children’s sizes, 24 months and 2T are approximately the same, with 2T slimmer in the hips (no diaper allowance), a 3T is slightly bigger (1/2″ ) than a 2T and the larger sizes increase about an inch per size in height and girth.
Once the girls were measured and I had my patterns traced and altered, it was cutting time and I was in the hot seat…I was SCARED. I even took the boxed dress down to south Georgia when Sarah said she’d help me lay it out and cut…we got busy and it didn’t happen, so the boxed dress came right back home. There was no more time to procrastinate, so I got out my seam ripper and started dismantling the dress into flat pieces, which I should have done sooner, but getting started was difficult. I got even a little more scared when I realized the seams would rip on their own, once I started them, but then I remembered the thread choices in 1969 would have been cotton (which disintegrates) and silk (Janice’s dress, though nicer than average, was not couture, so not likely.). I calmed down, rejoiced that the old cotton thread sped up my ripping time, used a sticky tape roller for the thread fuzzies and through trial and error with the iron and a silk pressing cloth, discovered that the fabric was silk, not synthetic as most gowns are today. (As a preteen, I melted a tremendous iron-shaped hole in my new polyester tee that I was expecting to wear on the first day back at school. As a result, I’m a very careful with an iron to avert such tragedies. I suspect my mom relaxed her “all clothes must be ironed” rule shortly after that.)
I went back and forth on whether to include the lining from Janice’s dress, with each piece cut and sewn as one with the heavy silk (not sewn together as a separate garment like in a coat lining). Although it was clean and wouldn’t be seen, the lining was unattractive and the fashion fabric wasn’t flimsy. The flower girls would be wearing the dresses in January, when it would be cold, so I included the lining. In hindsight, I probably could have left it out, but having the lining did make each dress easier to hem by hand.
I accessed the fabric of Janice’s dress: a nearly perfect detachable train, A-line dress front with some spots and skirt back in good condition. The sleeves were too slim for my puffed sleeve pattern pieces and the lace upper bodice was unusable. I laid out all the pieces before cutting anything, as I wasn’t taking any chances on messing up. The 4/6 was cut from the dress back, with some smaller pieces coming from the train, which was triangular and not as much usable fabric as I had thought. The toddler’s dress pieces were placed wherever I could find good fabric, so her dress included little bits of lace applique on the back. Although I had removed the old zipper from the original dress, I reused the back zipper folds and seaming lines, saving me a bit of time on both dress backs. The girl’s dress pattern had an A-line skirt, but there wasn’t quite enough fabric for the toddler’s skirt, so I cut it straight with no flare on the sides. Since she sat with her other grandparents during the ceremony and was busy having fun the rest of the time, I don’t think anyone could tell any difference. It took me almost a week and a half to lay out the dresses and cut them out.
Before I got very far into sewing, I made a trip to JoAnn’s for contrasting fabric for the sash, thinking if I couldn’t find fabric to match or coordinate with the “Senior” Flower Girl’s dusty mauve dress, I would just use pale pink ribbon. I was concerned about finding an elegant-enough fabric to combine with the heavy silk in such an unusual color, so I walked every fashion and formal fabric aisle, finally deciding to substitute wide bridal ribbon. I picked one I thought would work then walked by the cutting table…there in the remnant pile, the end-of-bolt discounted fabric, was just enough fabric for two little girls sashes in dusty mauve! The remnant cost less than $1, and I got the ribbon just in case, so Lucy the bride could decide which was best.
I sewed the dresses in a modified (only one seamstress, me!) assembly-line style, with two stacks of pattern pieces in the order they would be sewed. While I did the same steps on each dress, I was meticulous about keeping the dress I was not working on with its pieces. I did not want to deal with mismatched sizes, so the larger size on the left, smaller on right, with a paperweight on the unsewn pieces. I used new polyester thread and new zippers from the combined sewing stash (mine, Mema’s and Janice’s). I had both dresses ready to try on over December family gatherings, with the sleeves completed but safety-pinned on, just in case I needed to make any alterations.
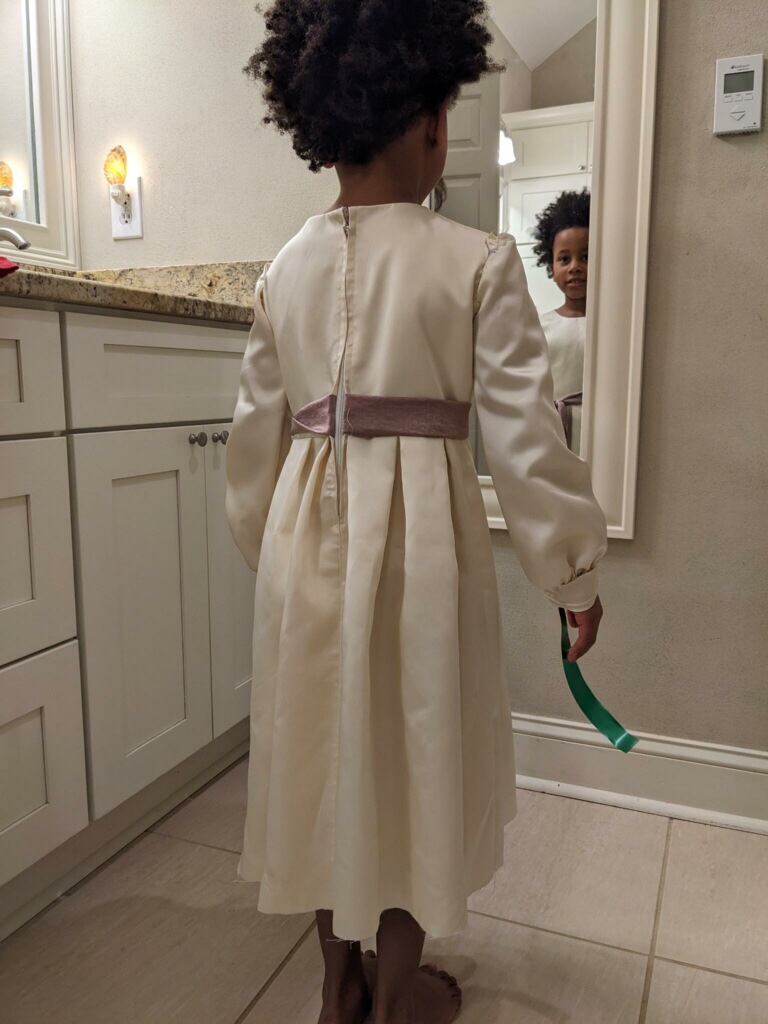
The kindergartener’s dress was a perfect fit! Lucy and Alex took it to their family dinner, as both of the older flower girls were his cousins, and she tried it on with lots of big smiles, with Lucy taking pictures. Success felt good! All I would need to do was sew the sleeves on and hem the dress.
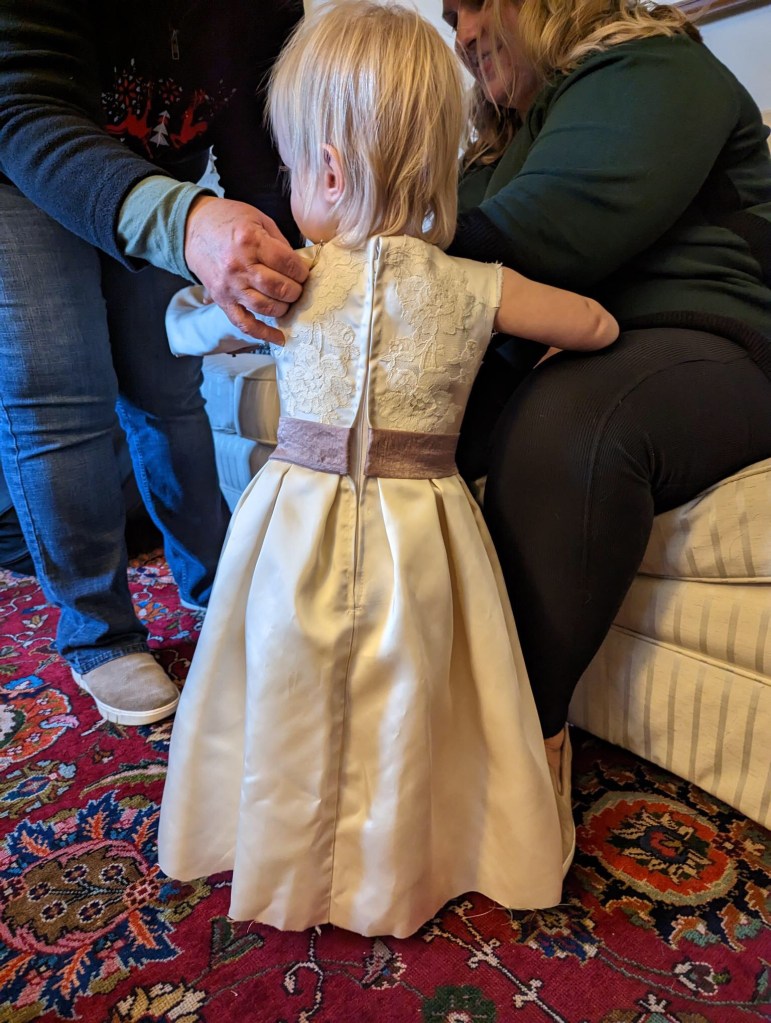
The toddler and her parents came to town Christmas week, and trying it on was an adventure! First, she’d never worn anything that long, at least that she could remember, and it was probably heavier than anything she had worn before. Once we got her zipped, she decided to run, toddler style, from the living room piano to the hallway stairs, back and forth, laughing and “talking” with her highly entertained audience. It stopped being fun about the time we snapped a few pictures and realized the back puckered around the zipper. But she was unhappy, so we unzipped and tried it on another day, when we figured out it was just too tight at the waist tie, which made since I had narrowed a size 3 to fit her (and toddlers don’t really have waists), yet this child could still wear 12 and 18 months clothing. The dress fit perfectly in the shoulders though, so I would just use the seam ripper from just under the armholes and gradually reduce the seam allowance from 5/8″ to 3/8″. Once it was steam pressed, the stitch holes would not show. Then it needed hemming and sleeves attached, just like the other dress.

All the machine sewing was finished before the second week of January. I determined the hem lengths, pressed them, then trimmed the linings at the fold lines. I sewed the neckline hooks, eyes and hand-hemmed both dresses in front of the TV the next few evenings, as I had started work on the bride’s rehearsal dinner dress during the days, my last sewing project for this wedding, and thankfully, the easiest pattern of all. It had been a great year of sewing, but it was time to celebrate the wedding in less than three weeks!

Well written and a wonderful telling a beautiful story of a labor of love.
LikeLiked by 1 person
Thank you!
LikeLike
John, you beat me to the phrase “labor of love”. That is exactly what this was! As the girls get older the story of their lovely dresses will be so special for them.
LikeLiked by 1 person
Thank you Nadeen!
LikeLike